Wednesday, September 29

Good Morning Sunshine! Now Serving Baked French Toast for Brunch

After an exhausting Friday-night-out with the girls, nothing sounds more amazing than French toast.  But who has the time to make French toast?!  Certainly not A and I.  Enter the solution A's family shared with me: Baked French Toast.  Every time I have visited A's family in Atlanta, we always wake up to that delicious smell of warm maple syrup and the oven creating wonders.  Without fail, A, her twin sister L, and I will all stumble out of bed and follow our nose's to the kitchen where Mama R and Papa R are preparing this easy, delicious breakfast feast.

My favorite thing about this recipe is that you can make it the night before, refrigerate it overnight, and toss it in the oven the next morning for 45 minutes and ta-da! breakfast is served!  It's great with fresh mixed berries on the side (think blueberries, strawberries, raspberries, and blackberries) and a big ol' cup of coffee to get your day started, or a mimosa, depending on what kind of mood you're in!

This is a super short, super quick, super easy dish to prepare and is liked by almost everyone.  I happen to not be a big fan of cream cheese (or not at all), but it is necessary for this recipe.  I like to reduce the amount of cream cheese, add some extra bread, maple syrup, and cinnamon on top.  I'm still trying to figure out a delicious alternative to the cream cheese so I don't end up eating around it, but I have yet to strike gold.


BAKED BRUNCH FRENCH TOAST
(Courtesy of Mama & Papa R)
Ingredients:
1 loaf of French bread (about 1 lb) cut into rough cubes
8 oz cream cheese (I like to reduce it to 4-5 oz)
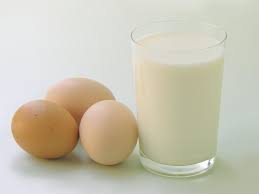
12 eggs 
2 cups skim milk 
1/3 cup maple syrup (and extra to put on top)
Preparation:
Cube the bread and place about 1/2 in layer in the bottom of a greased 9x13 cake pan.
Cube cream cheese & place on top of bread cubes.
Add remaining bread cubes on top.
Combine the eggs, milk, and syrup in a bowl.  Pour over the cubed bread.
Cover and refrigerate overnight (somehow makes it taste better).
The next morning, bake at 375 degrees for 45 minutes (bake covered for ~35 minutes and then uncover).
Serve with lots of maple syrup and fresh berries on the side.


The other variation of this brunch dish (which I have yet to try this exact recipe) sounds delicious and just as easy.  For someone who's not crazy about cream cheese, I think I might like the following recipe even better.  I have added the fruit and other additions to this recipe from past brunch cooking experiences, and I can't imagine any of it would taste bad -- especially when it's all drenched in maple syrup!  I'll have to make it this weekend and let you know...

BAKED CINNAMON & VANILLA 
FRENCH TOAST W/ BANANAS
Bananas w/ Maple Syrup over Baked
French Toast
Ingredients:
1 lb French bread (you can slice diagonally into 1-in slices or cubes)
8 eggs
2 cups milk
1 1/2 cups half-and-half cream
2 tsp vanilla extract
1/4 tsp ground cinnamon
3/4 cup butter
1 1/3 cup brown sugar
3 tbsp light corn syrup
2-3 bananas (depending on how much you like them... I LOVE them!)
Powdered sugar & cinnamon (to sprinkle on top).
Preparation:
Grease (or butter) a 9x13in baking dish.  Arrange about 1/2 of the bread pieces in the bottom of the dish.
In a large bowl, beat together the eggs, milk, cream, vanilla, and cinnamon.
Pour 1/2 the egg mix over the bread slices; add rest of bread on top; pour rest of egg mix on top (making 2 layers).
Cover and refrigerate overnight.
The next morning, preheat the oven to 350 degrees.
Combine butter, brown sugar, and corn syrup in a small saucepan; heat until gently bubbling.
Pour mixture over bread mixture.
Bake at 350 degrees for 25-30 minutes covered.
Remove cover; add banana slices to top; continue baking at 350 for 10-15 minutes (until it looks golden and just barely crispy on top).
Sprinkle some cinnamon & powdered sugar on top; serve with maple syrup and a fruit side.
My mouth is watering just looking at the recipe and these photographs?! Mmmmmm... I might not be able to wait until this weekend to make it.  Breakfast for Dinner anyone?!

Tuesday, September 28

Beauty Remedies Playing Hide-and-Seek in Your Kitchen

It's probably safe to assume that every woman has received advice on a beauty dilemma from a friend, co-worker, or parent recommending a kitchen-friendly solution.  I remember being shocked when my mom told me she used to wash her hair in beer and condition it with eggs!  But how many people actually get around to trying these home remedies or even know how to make them?  I know that I always think about it, but then I forget and end up at the drugstore buying my Neutragena's Deep Clean Cream Cleanser, Neutragena's Oil Free Wash, or Johnson & Johnson's Purpose (shown below, in that order).  Of course, that all adds up pretty quickly, but I do swear by all of these face washes, depending on my skin dilemma.
But a money-saving, at-home, kitchen remedy is always way more fun than just buying a face wash and some of the ingredients you learn about and use seem so bizarre!  Here are some of the best at-home remedies, several of which I've tried and several that I hope to try soon!

SKIN REMEDIES

1. PURIFY: Lemon & pineapple juice to get rid of large pores and blemishes.  Lemon and pineapple juice contain natural enzymes that tighten and firm the face, simultaneously purifying and brightening the skin.  Lemon, in particular, has the ability to cleanse and shrink larger pores.  The juices don't have to be fresh (they can be canned), but it smells better and works more naturally if freshly squeezed.
  1. Fill a large basin with extra warm water, but not scalding.
  2. Hold your face over for 1-3 minutes of a calming steam facial to open your pores.
  3. Drench a washcloth in lemon and pineapple juice and put on your face for 1 minute.
  4. Rinse your skin with warm water.
  5. Apply ice cubes to your face by gently placing and holding them along your pores for 15-30 seconds.  This has a tightening effect on your skin.
2. EXFOLIATE: Scrubbing facial with lemon juice & sugar.  This is a great solution a facialist at Aveda told my mom, our friend C, and I about.  She recommended this for anyone that needs a brightening facial, but doesn't have the funds to get it done at a spa.  Again, the lemon juice cleanses and shrinks the pores, while the sugar in the raw gently scrub away the surface layers of your skin, leaving it softer and brighter.
  1. Squeeze 1-2 lemons into a small bowl.
  2. Empty 3 packets of sugar in the raw (the brown packets you always see at Starbuck's, but you can buy a box of them in any grocery store).  You want the mixture to be a little goopy, not runny.
  3. Use the mixture to gently scrub your face.  Make sure to scrub your neck and jaw bone.  I usually spend 30 seconds - 1 minute scrubbing.
  4. Rinse your skin with warm water.  Pat your face dry.
3. SOFTEN: Avocado & honey skin softener.  Avocados are packed with anti-oxidants and the honey helps attract and retain water.  And best of all, it gives you that green-colored mask that you always see in spas on TV.  If I'm feeling really decadent, I'll slice a cucumber and put 1 over each eye (as they get warm, replace).  Ahhhh....
  1. Mash 1 ripe avocado in a small bowl.  The riper it is, the easier it is to peel and mash.
  2. Add 2 tbsp honey and 1 tsp lemon juice; stir.
  3. Apply paste to face and let dry.
  4. After 10 minutes, wash it off your face with warm water.
4. MOISTURIZE: Sugar & coffee body scrub.  Do not use this one on your face.  This treatment works really well when combined with a night-time shower.  The heat of the shower will open you pores and allow the oils to sink into the skin overnight.  This is a deep moisturizer... perfect for ashy skin (if winter even happens this year).  The ratios of this do not really matter, so feel free to make variations.
  1. In an air-tight jar, combine 1 cup coffee granules (wet ones from that morning's coffee), 1/2 cup of both coarse sea salt and table salt, and 1/2 cup brown or granulated sugar.
  2. Add 1/2 cup of almond, olive, or coconut oil.  You should have a squishy texture.  If it's still dry, add more oil.
  3. Rub all over skin in the shower.  After the body scrub, rinse it off.  It's a pretty oily mixture so it might feel like you didn't totally rinse off... that's the way it should feel.
  4. Once out of the shower, pat body dry with towel and get into your PJs :)
  5. Wake up the next morning with deeply nourished, almost baby-butt-soft skin.  I like to take another shower that morning if I feel at all oily.  I almost always take a morning shower, so it may just be my neuroticism.  
HAIR REMEDIES


1. CONDITION: Beer & Chamomile.  A mix of beer and chamomile will work as a lightening conditioner (not dramatically; very subtle).  It will leave your hair shiny, thicker, and softer.  Hooray Beer!
  1. In the shower, shampoo as usual.  
  2. Pour 1 pint of beer (I like to use Guinness, but any will do) slowly throughout your hair.
  3. Rinse with lukewarm.  Make sure to get out all of the beer.
  4. Take chamomile tea (that has been boiled and cooled) and pour it slowly throughout your hair.  This is primarily to disguise the beer smell; let it sit for a few minutes.
  5. Rinse with cool water.
2. SMOOTH: Milk & Eggs to the Rescue.  Now this is one I distinctly remember my mom telling me about.  I remember thinking it was soooooo weird to put eggs in your hair... who does that?!  Well mom, I was wrong.  You were right.  It is magical.
  1. Pour about 1 cup of milk into a large bowl.
  2. Separate the egg yolk from the whites by cracking the egg and letting the whites pour out, over the shell, while keeping the yellow yolk in the shell pocket (these are what your want!).  Pour the yolks into a different bowl.
  3. Pour just enough olive oil in the bowl to cover the yolk.
  4. Add 1 tsp of sugar into the yolk/oil mix ans stir well.
  5. Soak you hair with warm water.  (I think this whole process is easiest in the shower = less of a mess and easier to deal with your hair.)
  6. Shampoo and condition you hair really well, work it into a lather, and rinse.
  7. Now pour the milk over your hair & run a comb through it.  Let it sit for 5 - 8 minutes. (This is a good time to shave your legs and all of the other time-consuming shower rituals you have.  Just don't rinse your hair yet.)
  8. Rinse out your hair again with warm water.
  9. Massage the olive oil/yolk mixture into your scalp (it's going to feel gooey and weird, but let the eggs do their magic).  Let it sit for at least 10 minutes.  (I usually get out of the shower after doing this part and put a shower cap over my hair while I dry off.  I don't take a long-enough shower to let it sit for 10 minutes on top of the milk sitting before.)
  10. Rinse out your hair with cold water, helping to get rid of the frizz.  (I rinse it out by leaning over the tub and using the faucet to rinse.  You can just get back in the shower if you want to enjoy some cold water!)
  11. Dry your hair by shaking it out or using a hair dryer.
3.  LIGHTEN: Rhubarb & Chamomile Rinse.  Lighten your hair with a fruitful and relaxing rinse.  This natural rinse is best for medium to light brunettes and for blondes. 
Chamomile flowers
TIPS: 1) This rinse works best if you can let your hair dry naturally, especially in the sunshine (perfect!).  
2) Hair benefits most from lukewarm shower temperature and is damaged by hotter temperatures.  The best hair wash is one that uses only lukewarm water for the whole wash.  
3) Borax is one of those random things that can be hard to find.  It is simply sodium borate is typically sold at supermarkets, health food stores, and sometimes hardware stores.  
WARNING: Handle the borax carefully.  Do not leave it lying around where children or pets could access it and possibly swallow it... it's a poison when ingested!
  1. Chop 4oz (about 3 stalks) of rhubarb finely and put into a saucepan.
  2. Add 1 tbsp dried chamomile flowers and 1 quart of water in the saucepan.
  3. Bring the water to a boil, cover & simmer the mixture for 20 - 30 minutes.
  4. Remove the mixture from heat and let it stand until lukewarm.  When it has cooled, strain the mixture.
  5. Add 1 tsp borax to the mixture & your rinse is ready!
  6. Pour it through your hair after washing it as normal with shampoo.
Useful On-the-Go & Quick-Fix Tips:


 QUICKLY DRY YOUR NAILS:
by dipping them straight into a bowl of ice cold water OR spray them with a little cooking oil.
If only a cucumber eye mask 
came with that massage...


SLEEPY EYES: Use cucumbers to reduce puffy eyes and teabags to remove dark circles.  A new one I learned is to soak 2 cotton balls in 1/4 cup cold milk.  Place them over your eyes for 5 minutes.
QUICK WAY TO ENHANCE YOUR HAIR:
1) The age-old tip of using fresh lemon juice to lighten your hair and enhance your natural hightlights IS TRUE.  It looks natural and works wonders.  Plus it smells great!
2) A rosemary rinse can also do the trick.
3) A parsley and lemon mixture can be used for "hair so healthy, it shines!"
FIX BAD BREATH: 

A) Order a Waldorf salad when out to eat and request extra apple.  Apples freshen and remove any pieces of stuck food in your teeth that may be causing stale breath. 
B) Rinse with hydrogen peroxide.  It can be used as a quick mouthwash and is one of the best, long-lasting bad 

breath cures.  


C) Order a dish that comes with ginger, basil, mint leaves, or parsley.  Discreetly chew on any of these for instant refreshment.  Tip: You may want to excuse yourself to the restroom and check for any herb pieces stuck in your teeth.
D) Chew sugar-less gum.  It will stimulate the saliva production in your mouth, helping to wash out some of the bacteria and food particles and prevents dry mouth.
E) Drink water and ask for lemon.  Discretely squeeze as much of the lemon into the water as possible; it will help cover up any odor and reduces dry mouth. 
Leighton Meister and Blake Lively on the
set of Gossip Girl in NYC

I'm going to follow as many of the tips and tricks I've shared.  Beauty remedies from the kitchen are fun, inexpensive, and always an adventure.  And maybe, just maybe, if I do them ritually, I'll glow and look as fresh and awesome as Leighton & Blake do so easily.
(Yeah right... I think that one's going to remain a far-fetched dream.  But at least my skin will be soft and my nails will be dry!)
xoxo
K

Monday, September 27

Get Your Protein Fix: Bulgur Risotto with Corn & Shrimp

Bulgur Risotto with Corn & Shrimp (plus asparagus)
Unfortunately, Mac Monday is going to be on a brief hiatus this week.  I know any recipe I share won't be as creative or adventurous as a Mac recipe, so I'm not even going to try.Instead, at the request of a best friend, former soccer teammate at Davidson, and most recently a triathlete, I wanted to share a protein-rich and healthy carb-loaded meal, perfect for the pre-race day dinner!
          I first found this recipe when I was holed up in my apartment for 2 weeks in early February: partly because of the absurd amount of snow North Carolina got, but mostly because crutches and snow don't mix.  I'd had knee surgery #4 at the end of January and was desperately seeking ANYTHING to keep me entertained and not stir crazy. My mom was amazing and was helping me for those weeks and even more amazing, was cooking dinner for A and I almost every night!  I found this recipe and fell in love for a few reasons: 1) risotto is delicious and I became slightly obsessed in Florence, 2) corn is always a sweet addition to any meal, salad, appetizer, really to anything, and 3) shrimp is a nice, and seemingly fancy, treat plus it is super easy to cook!  
Bulgar wheat from
Fresh Market
          Bulgur wheat is a strange-little seed-like food that's in the wheat family.  It's incredibly rich with fiber and is a healthy source of carbohydrates.  It can be a little hard to find sometimes... your best bet is a fresh/health food store like Fresh Market, Trader Joe's, or Whole Foods.  Many popular grocer stores do (or did) have it; I had previously gotten it at the Harris Teeter across the street, but they recently did inventory and decided to not carry it anymore since they didn't sell very much of it (argh).  Luckily, there's a Fresh Market down the street and they had it - really fresh and inexpensive.  The shrimp in this recipe gives it an extra boost of protein to make it a yummy, well-rounded meal (and the whole recipe only takes about 15 minutes!).

This meal is great for anyone who's active and might need an extra boost the day before an event (ahemm.... A & M).  It tastes amazing for being so health... One serving of this delicious and healthy creation will provide you with:
347 Calories
45g Carbohydrates
8g Fiber 
AND 24g of PROTEIN!!!

Enjoy and Good Luck M on Sunday!!!
BULGAR RISOTTO WITH CORN & SHRIMP
makes about 4 servings (I like to double it for leftovers)

Ingredients:
Detail of Bulgur Wheat
2 tbsp olive oil
3 cloves garlic (of course, I add a little extra garlic, an additional 1-2 cloves), finely chopped
1 cup bulgur wheat 
1/2 tsp salt
12 oz fresh or frozen (thawed) raw shrimp, shelled and de-veined 
2 cups fresh or frozen corn kernels
1 medium red bell pepper, chopped
2 limes -- 1 juiced, and 1 for wedges (I squeeze 2 limes into it, so 3 in total)
1/4 tsp red pepper flakes
1/4 cup cilantro, chopped (you can be generous with the cilantro, I certainly am)

Finished dish, with asparagus & cilantro added on top
Preparation:
- In a large pot, heat oil over medium-high heat.  Add garlic and cook for about 30 seconds, stirring constantly.
- Add bulgur wheat and salt; stir 1 minute more.
GRADUALLY stir in 2 cups boiling water (you can do this in the microwave for simplicity), 1/2 cup at a time.  With each pour, wait until the bulgur absorbs the water before adding more; by the end you want the bulgur to be slightly soupy (which takes about 8-10 minutes of cooking time) and fyi -- you might not use all of the water or you might need a little extra.  Go by texture, not specifics from the recipe.
- Add shrimp and cook, stirring constantly, until the shrimp turn pink (about 2-3 minutes).  
- Add corn, bell pepper, lime juice, and red pepper flakes; stir & add water as necessary to keep bulgur creamy.
- Continue cooking and stirring until corn and pepper are warmed through (about 1-2 minutes).
- Add cilantro & serve with lime wedges.

          A & I served it with asparagus on top, because we like asparagus, but mainly because we had to use it up before it went bad!  It was great; we steamed the asparagus and didn't add anything to it.  We cut it into thirds and served on top.  I mixed all of mine together and it was great!
Mmmm Mmmm Mmmm... delish!!

...Thanks M for the request and good luck on Sunday!

Saturday, September 25

Side Dish (Actually a Note)

        I'm going to be ÃœBER busy today and tomorrow and won't be able to share another delicious recipe with you until Sunday night or Mac Monday.  I am at an orientation/training session for a volunteer program I joined all day long.  It's a great organization that just celebrated it's 20th anniversary, "The Best Buddies Program."  Best buddies are young volunteers that are assigned to  a family of a transplant patient on the Pediatric Bone and Marrow Transplant Unit at Duke Hospital.  You're able to work one-on-one with the family and child to provide emotional support, time for the parents to be out of the hospital (there has to be a parent with the children 24/7), and a great excuse to get to know and have lots fun with some pretty amazing kids.  
        Afterwards, I am off to Charlotte to meet up with A and visit one of our soccer teammates from college.  We are going to enjoy a little thing called "Oktoberfest."  Okay, it's not the real thing and it's not exactly German, but it's a great excuse to try new beers, reminisce, and celebrate with old and new friends!
I'll try and keep track of some of my favorites to share with you!
xoxo
K

Friday, September 24

Pasta Inspiration: Big Bowl of Radiatore with Sausage, Onions, Mushrooms, Tomatoes, and Basil

Harris Teeter's (I know, not 
very Italian) Radiatore, 
still steaming hot!
After writing about all of those delicious pastas yesterday, I decided to try a kind that I'd never had: Radiatore (aka Radiators)!  They're this funny little shape that looks like a spiral on one side, but the other side is hollowed out like a cuff bracelet.  It's bizarre and intriguing and keeps dinner a little exciting !  Pastas like this have all of the nooks and crannies to really maximize the sauce and other ingredients you choose.  I love the traditional fettuccine, linguine, penne, and so forth, but somehow a uniquely shaped pasta adds a je ne sais pas to an otherwise fairly ordinary dish.


A and I were both exhausted yesterday after long days at work (I was at a conference all day and A was trapped at her computer in cubicle-land) and neither of us wanted to cook, but we didn't want to eat cereal or bad freezer food.  After rummaging through the pantry, I found a hidden bag of pasta that I don't remember buying!  I remember there being a "4 for $5" deal, but I thought I stuck to the basics... apparently I thought these were typical Rotini spirals, but surprise! they're way cooler!

Detail of the funny-shaped
Radiatore pasta
So now I have pasta, I know there's some garlic in the fridge and some frozen spicy Italian sausage in the freezer... What can I do with these?  ...Pick up some tomatoes, fresh basil (yum), mushrooms, and a white onion and we're in business.  A and I joke that this is our "Hodgepodge" meal, because we end up making something similar to this every time we have random ingredients and don't want something hard to cook.  ...A quick run to the grocery store and 20 minutes later we'll have a hot dinner with plenty of leftovers for this weekend when we don't want to cook again!  It's similar to the Fresh Tomato, Basil, and Pecorino Romano Pasta I shared earlier, but this is the easy way to get rid of leftover ingredients in your fridge in one, quick meal.  Make it your own!
HODGEPODGE PASTA 
(When you need to clean out the fridge and pantry)
Ingredients:
1 lb of Radiattore (or whichever shape suits your fancy) pasta
3 links of hot Italian sausage (I do 1 link/person, but we wanted extra so 3 worked)
1-2 cans of diced tomatoes (2 if you want a soupier, sauce-heavy meal)
1 6-oz package of pre-sliced mushrooms
1/2 white onion, diced
1 bunch of fresh basil (choose a bigger bunch if you want lots of basil and for garnish)
Fresh, shredded Parmesan or Pecorino Romano cheese (for sprinkling on top)
Salt & Pepper
Oregano or other Italian seasonings you may want
Preparation:
Boil water in a large pot for the pasta.  While the water is boiling, prepare the sausage.  You can either slice it for small rounds of sausage, or remove it from the casing and be crumbled (more like hamburger meat).  If you're slicing, I've found it easier to cut them when they're cold because they hold their shape better, then defrost; otherwise defrost first before removing from casing.
Hot Italian sausage cooking (and
making plenty of its own oil)
Heat a drizzle of olive oil in a large skillet; add the sausage (the oil should be hot enough that the sausage sizzles as soon as it hits the pan).  You don't need a lot of olive oil for this recipe because the sausage itself will produce enough oil.

Cook sausage thoroughly on medium-high heat for 8-10 minutes tops.  Place a piece of aluminum foil underneath 4-5 layers of paper towels (you can fold them); place the sausage on the paper towel/aluminium foil.  The paper towel will absorb some of the unnecessary grease and the aluminum foil keeps the oil from seeping through to the counter or plate underneath.
  
...By now, the water should be boiling for the pasta.  Reduce the heat to medium and cover to keep warm; once you start the veggies in the skillet, bring it back to a boil.  The Radiatore cook in 5 minutes, so you want to leave the pasta for last; it's a pain to wait for water to boil, so I do it ahead and keep it warm until I'm ready.  

Cooking the mushrooms 
and onion
In the same warm large skillet, pour about 2-3 tbsp of olive oil and add the garlic first; let garlic cook at medium high for 1 minute and then add the diced onions.  Let this cook for another minute.  Add the mushrooms and a minute or 2 later, add 1 can diced tomatoes, with juice; stir occasionally.

Cook until mushrooms are tender (about 4 minutes).  Add the "de-greased" sausage back to the skillet and mix with the rest of the ingredients.  Cook for 2 minutes and then add the fresh diced tomato last.  Tomatoes cook the fastest out of all the ingredients, so to avoid overcooking them, add them last.

Steaming hot sausage, onions, 
garlic, mushrooms, and tomato 
mixture... almost done!
Salt and pepper the mixture and add some Italian spices; I usually add a little oregano and then double that amount with and a pre-mixed Italian seasoning blend of spices.

Stir mixture together and let the tomato juice come to a slight boil.  Remove from heat.  When pasta is done, remove from heat and drain.  Done with the cooking... on to the presentation!  Pour pasta into a large serving bowl.  Pour sausage mixture over the top of the pasta.


The meal before a little make-over (still looking
delicious and steaming hot)!
Just to show you the difference that basil can make, I took a picture before I added the basil (right).  Then I tore up about 6-8 good-sized basil leaves into tiny pieces and sprinkled on top of the dish.  Finally, I took 4 whole leaves and arranged in a circle in the middle of the pasta (see photo) and added an intact basil bud with smaller leaves to the middle.  

...And whammy!  There you go, a beautiful and presentable dish.  It tastes as good as it looks.  Sometimes I feel a little silly garnishing a dish just for A and I to destroy .5 seconds later, but I figure it's good practice and it looks damn good for those .5 seconds.

The masterpiece.  Perfetto!!!


Even if you eat most of your meals on the floor like A and I do, you can still take pride in having a beautiful, delicious meal.  Pasta, sausage, basil, cheese, and beer all while watching Glee on our DVR!!  I can't think of a better evening!


Buon Appetito!


Our typical dinner positions: I'm on the left in the photo
 (right of the TV) and A is on the right (left of the TV). 
We don't know why, but we NEVER deviate from this little 
gem of happiness, our spots on the rug watching TV!