Showing posts with label Mac Monday. Show all posts

Tuesday, February 15

The Return of Mac Monday... on a Tuesday!


In Galway, Ireland 

MAC MONDAY
Kissing the Blarney Stone
I’ve been in Ireland for almost 2 months now.  I’ve tried several traditional recipes and had some traditional irish meals out at restaurants.  The lamb stew I had at the café above the English market was probably the best meal I have had at a restaurant.  I also made a true version of the Sheppard’s pie that I posted a few months ago.  But tonight I am going on a whole new adventure in the culinary world:  Irish Tripe Stew!!!  

For those of you who don’t know what tripe is you probably don’t want to know, but for the sake of honesty I will enlighten you.   Tripe is the stomach lining of an animal, and in this case I used tripe from a cow.  I do most of my grocery shopping at a place called the English Market here in Cork.  As you walk in there is a butcher that specializes in Tripe and blood sausage.  So every time I have gone to buy food I see the tripe there.  This weekend I finally got up the nerve to try it. 

MAC'S GAELIC TRIPE STEW
Ingredients:
2-2½ pounds honeycomb tripe, diced
1 quart milk
3-4 medium onions, sliced
3-4 medium potatoes, diced
Salt
Pepper 
Fresh parsley to taste, chopped 

Preparation:
- Wash the tripe and then cut it into small bite sized pieces.  
- Then place the tripe into a large pot and cover it with water.  
- Then simmer the tripe for 2 hours.  
- Tripe can be very chewy if you don’t prepare it properly.  
- Cooking it this long helps to improve the texture of the tripe. 
- After 2 hours of simmering drain the tripe of the water and return it to the pot.  
- Then add the potatoes, onions and milk.  
- Simmer again for an additional hour or until the vegetables are tender.  
- After the hour add the salt, pepper and parsley to taste.  
- Then serve and enjoy. 


I hope some of you muster the courage to try this recipe.  It is a very traditional, yet simple Irish dish.  
Remember, cook what you love, love what you eat.  


Monday, December 13

Mac Monday: Essential Study (or Work) Snacks


...or for those of you that aren't lucky enough to still be in school:
Essential Work Snacks

Sorry to disappoint you all, but I don’t have a recipe to share this week.  Since it is the end of the semester, I have been bogged down (sadly not blogged down) with quite a bit of work.  I have the pleasure of writing one paper on property tax reform and its effect on education finance in the 1970s, 2 papers on Caribbean history, a presentation about the medically under-served population in West Virginia, AND 2 tests -- I'm studying for a test on the Classical tradition in America and one on the French Revolution.   I know, it sounds like a blast... Want to help?  Because of all of this, I thought it'd be more appropriate to share some of my study snacks and tips that help make all this work a little more bearable. 

Tip #1: How to avoid the caffeine crash after a cup of coffee or energy drink.
Energy drinks and coffee are great for helping you focus when you have to stay up late for some last minute studying or to finish up a paper. However, most people feel like they only have short bursts of energy and focus; they eventually have a caffeine/sugar crash and lose their energy.  This is because of the high amounts of sugar and caffeine in energy drinks and coffee.  Your body has to work hard to digest these materials, which contributes to the crash you feel a few hours after drinking them.  Digesting sugar and caffeine dehydrates your body and make you tired and sleepy.  If you drink a couple glasses of water (I set my sights on finishing an entire Nalgene bottle) after finishing your coffee or energy drink, you will stay awake and focused much longer and avoid getting the jitters.  The only negative side effect is that you might need to run to the bathroom more often than you would like!

Tip #2: Healthy snacks will keep you going.
Personally, I love to snack while studying.  Potato chips, or some chips and salsa are an awesome snack to have while studying.  However if you plan on studying for several hours at a time, snacking on these can rack up quite the calorie count.  I discovered that carrot chips and sliced cucumbers are a much healthier snack and they help to keep you hydrated (which helps with the dehydration from the energy drinks and coffee).  Another nice bonus is that these snacks are not greasy so you won’t get your keyboard or notes dirty while studying. 


Tip #3: The right music makes all the difference.
I know this study tip has nothing to do with this blog but it is something that I have found to be key to successful studying.  If you study in a library or your dorm/apartment then you will almost always have some random background noise to annoy you.  Throughout the semester you should make one playlist for when you study and only listen to that playlist.  Make it songs that you don’t usually listen to and it is helpful if they don’t have works, or the words are in a language you don’t know.  This helps so that you don’t sing along.  Every time you study throughout the semester you should only listen to that playlist.  This way you train your brain to focus when you hear that playlist. If you always start with the same song, when you hear that song you will snap into a focused state and hit the ground running when you study.  I personally like to start off with Andrea Bocelli’s Con te Partio (one of my sister's FAVORITES too) and follow it up with Andrés Segovia’s classical guitar. 


I hope most of you are at the point in life where you no longer need to deal with the stress of finals and can use these tips for work.  But if you're like me and stuck in the misery of finals week, these tips should make it a little bit more bearable.  I’ll be back next week with a fun and tasty recipe for you to try out.  And if you're really crunched for time and desperate, wear a Camelback while you study.
Until then cook what you love, love what you eat, and good luck with finals.  

Monday, December 6

Hooray for Mac Monday: Irish Beef Stew (a Mac original!)

A few weeks back I was looking for a good beef stew recipe to do for Mac Monday, but none
of the recipes I found online really piqued any interest.  While home for thanksgiving, I talked
to two of my uncles, both of whom you could call "culinary experts."  They gave me the basic
rundown on how to make beef stew, but they reminded me that the great part about beef stews
is that there is not one right way to make it; you can make it differently every time and it will
still turn out great!
The crazy McCormick's... somehow all great cooks!
So I took their advice and gave beef stew a shot.  The following recipe is what resulted and I think it turned out pretty good.  However, considering I have been eating beef stew since Friday with no end in sight, I can safely say that I did make a little bit too much.  I looked at the recipe on the back of the canned beef broth for some basic ideas on how long each step of the cooking should take, but then I just improvised the rest of the way.


Ingredients:
Serves: 8-12
2 lbs of beef, chopped into 1 inch cubes
4 potatoes
2 cups chopped carrots
2 cups chopped celery
2 cups chopped onions
6 cloves of garlic, crushed and pealed
4 cans of beef broth
2 12 oz. bottle of Guinness draught
Salt
Pepper
Thyme
Parsley
Vegetable oil


Preparation:
In a really big pot, most likely the biggest one you have, (sorry I don’t know how big exactly
mine is because it is one I inherited from the people who lived in my apartment before me) cover
the bottom with a thin coating of vegetable oil and place it over medium heat.  
Then add the crushed garlic.  While the garlic begins to cook, place the meat into a large mixing bowl. 
Add a few generous pinches of salt, pepper, thyme and parsley and stir until they are evenly spread out on the beef.
Add the beef to the pot and stir frequently until the meat is browned on all sides, about 20 minutes. 
There should be little bits of beef starting to stick to the pot before you add the liquids. 
Once the beef is browned add 1 bottle of Guinness and then the beef broth. 
Bring it to a boil and then let it simmer for 90 minutes. 
Add some additional thyme if you are feeling adventurous. 
After the 90 minutes of simmering, stir in the potatoes, carrots, onions and celery. 
Add in the 2nd bottle of Guinness. 
Increase the heat to medium-high and bring to a boil. 
Let the stew boil for about 20-30 minutes or until the vegetables are cooked through (the potatoes are the key). 
Add any additional salt and pepper to the broth based upon your personal taste, but remember it is always better to under season rather than over season. 
You can always season your individual serving to your taste. Now comes the best part, serve and enjoy!
A little grainy, but you can still tell it's delicious!
I hope you enjoy this recipe. It is an easy way to have a nice warm and hearty meal in the winter
time. Remember, cook what you love, and love what you eat.

Monday, November 29

Mac Monday: Mac's Too Full from Turkey, Leftovers, and Meatballs

Mac is too full  for a Mac Monday Post!

But lucky for you, I'm not!  I'll be sharing pictures and a few select recipes from the crazy McCormick family throughout the rest of the week!
Mac making his famous meatballs

Monday, November 15

Hooray for Mac Monday: New England Clam Chowdah

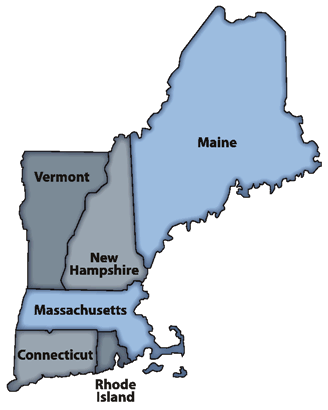
The states of New England
It is finally getting into the colder months of the year, so I figured it was time to share a dish that will warm everyone up.  NEW ENGLAND CLAM CHOWDER is easily a favorite of the McCormick family not only out of the soup category, but overall too.  I was browsing around on the internet for some interesting takes on a traditional chowder and I found one particularly intriguing recipe from Sam Adams (yes the beer company has recipes on their website)!  

Most recipes include a salt pork, chorizo (spicy pork sausage), or some other meat to add to the salty flavor of the chowder.  This Sam Adams recipe omits the additional meat altogether and added many more vegetables to make the chowder hearty and filling.  A bottle of Sam Adams light is also included in the recipe, much like many chili recipes do; and just like in a chili or a stew that requires beer, you don't have to worry about everyone at the table getting drunk from the chowder because the alcohol will cook off, leaving a delicious flavor behind.  

INGREDIENTS:
1 bottle Sam Adams Light
1/4 cup diced green bell pepper
1/2 cup fresh clam juice (or canned if you can't get fresh)
2-3 cups heavy cream
2-3 tbsp Italian seasoning
2 tbsp. freshly minced garlic
1 cup diced russet potatoes
1/2 cup fresh chopped clams
1/4 cup diced carrot
1/2 cup all-purpose flour
1/4 cup diced onion
1/2 cup melted butter
Fresh parsley for garnish

PREPARATION:
Combine the carrots, green pepper, onion, Italian seasoning, garlic, and melted butter in a pot over medium-high heat.  Cook until the vegetables are crisp and tender.

Stir in the flour and reduce the heat to low; make sure to continue mixing until the the mixture is well-blended and begins to form a roux (a cooked mixture of wheat flour and fat; see wikipedia.com).

Continue to cook over low heat for 1-2 minutes until the flour taste is fully cooked out.

Add the Sam Adams Light, clam juice, potatoes and the heavy cream to the pot. 

Return the heat to medium-high and simmer for about 10 minutes (or until the potatoes are cooked and the soup is becoming thick).  

Stir in the chopped clams and continue to simmer for another 5 minutes until the clams are fully cooked.  Be careful not to overcook the clams because they will become rubbery and lose their flavor.

Serve in soup bowls and sprinkle some fresh parsley on top.  You can also add fresh croutons or traditional chowder crackers.  
Unfortunately, I haven’t had the chance to make this recipe yet, but it will be one of the first things I cook when I have time and I'm cold enough.  My sister loves clam chowder, so I may just have to throw something together in the form of clam chowder when I see her over Thanksgiving break!  

I'd love to hear what you think of it.  If you have the chance to try it, let me know how it turns out!!
It does look especially delicious, so I hope it lives up to the reputation.  

Remember, cook what you love, love what you eat. 


Click here to view the recipe on the Sam Adams website.

Monday, November 8

Hooray for Mac Monday: Seared Scallop served over a Parmesan Wafer

Sea scallops still in their shells
My Senior year of High School I discovered that I was not the only one in my group of friends who loved the show Iron Chef. Once we realized we decided to have an Iron Chef style cook
off. We had to make 3 dishes that all contained the secret ingredient basil. I ended up winning the battle and solidified my “reputation” as the chef my family now sees me as. I talked to the judges after the battle and it turns out that the last two courses were almost dead even, however it was my appetizer that put me above the competition and gave me a handy victory. The appetizer consisted of two components, a pan seared scallop and a Parmesan basil wafer.


Kate's favorite baking necessity:
her Silpat (buy it at Bed, Bath & Beyond or Macy's
Parmesan, Basil and Lemon Wafers
Ingredients:
1 cup shredded Parmesan* 
2 tablespoons shredded basil leaves
1/2 tablespoon grated lemon zest
     *In this case Pecorino is not an adequate substitute--it does    
       not melt the same as Parmesan.


Preparation:
Preheat oven to 400 degrees F.


Crispy Parmesan, Basil, & Lemon Wafers
Mix all ingredients together in a bowl. Transfer a heaping tablespoon of Parmesan mixture onto a silicone or parchment-lined baking sheet and lightly pat down. A silicone baking sheet, like Kate's favorite Silpat (click here), is highly recommended for this recipe. Repeat with the remaining cheese mixture, spacing the spoonfuls about 1/2-inch apart. Bake for 3 to 5 minutes or until golden and crisp. Cool and use a flat spatula to transfer from lined baking sheet.


Seared Scallops
Ingredients:
1 to 1 1/4 pounds dry jumbo sea scallops (approximately 12-16)
Searing the scallops
2 teaspoons unsalted butter
2 teaspoons olive oil
Kosher salt
Freshly ground black pepper


Preparation:
Remove the small side muscle from the scallops, rinse with cold water and thoroughly pat dry.


Add the butter and oil to a 12 to 14-inch saute pan on high heat. Salt and pepper the scallops.
Once the fat begins to smoke, gently add the scallops, making sure they are not touching each other.Sear the scallops for 1 1/2 minutes on each side. The scallops should have a 1/4-inch golden crust on each side while still being translucent in the center. Serve immediately.


Serving Directions:
Place the wafer on the plate. Then place 3 scallops in a triangular formation on top of the wafer.
Garnish with some freshly cut basil and a basil stem for presentation.
Scallop fishing zones off the Canadian coast
Scallop fishermen in Rhode Island
(my favorite fishing state)
I hope you enjoy this dish. The wafer and scallop really complement each other well. The salty nature of the Parmesan cheese complements the scallop well, yet the basil and lemon zest provide a nice fresh balance to the hearty nature of the scallop. It is an easy way to add a quality appetizer to any meal. It can be served before almost any Italian style dish, but it works especially well before a steak dish. Remember cook what you love, love what you eat.


Click here for the original seared scallop recipe from The Food Network and 
here for Giada de Laurentiis' Parmesan-Basil Wafer.

Monday, November 1

Hooray for Mac Monday: Roma-Style Chicken

After I went off to college, I realized how much I took for granted the amazing kitchen I had at home.  Now it has become a mini-tradition that when I come home from school I look up a new recipe and make diner for the family.  Over the past few years I have found a bunch of good recipes but this one is by far my favorite.  It may look a bit complicated because of the number of ingredients, but if you read over the recipe before you start and then have the recipe out while you are cooking it is pretty easy to manage. 


ROMA-STYLE CHICKEN


Ingredients
• 4 skinless chicken breast halves, with ribs
• 2 skinless chicken thighs, with bones
• 1/2 teaspoon salt, plus 1 teaspoon
• 1/2 teaspoon freshly ground black pepper, plus 1 teaspoon
• 1/4 cup olive oil
• 1 red bell pepper, sliced
• 1 yellow bell pepper, sliced
• 3 ounces prosciutto, chopped
• 2 cloves garlic, chopped
• 1 (15-ounce) can diced tomatoes
• 1/2 cup white wine
• 1 tablespoon fresh thyme leaves
• 1 teaspoon fresh oregano leaves
• 1/2 cup chicken stock
• 2 tablespoons capers
• 1/4 cup chopped fresh flat-leaf parsley leaves


Preparation:
Season the chicken with 1/2 teaspoon salt and 1/2 teaspoon pepper. In a heavy, large skillet, heat the olive oil over medium heat. When the oil is hot, cook the chicken until browned on both sides. Remove from the pan and set aside.


Keeping the same pan over medium heat, add the peppers and prosciutto and cook until the peppers have browned and the prosciutto is crisp, about 5 minutes. Add the garlic and cook for 1 minute. Add the tomatoes, wine, and herbs. Using a wooden spoon, scrape the browned bits off the bottom of the pan. Return the chicken to the pan, add the stock, and bring the mixture to aboil. Reduce the heat and simmer, covered, until the chicken is cooked through, about 20 to 30 minutes.


If serving immediately, add the capers and the parsley. Stir to combine and serve. If making ahead of time, transfer the chicken and sauce to a storage container, cool, and refrigerate. The next day, reheat the chicken to a simmer over medium heat. Stir in the capers and the parsley and serve.
_________________


This meal has a really nice complex flavor but it has a nice balance between a fresh and hearty flavor.  If you want to add a carb to the meal it works really well served over white or brown rice.  I hope you enjoy this meal.  It is a great choice any time of year.  Remember cook what you love, love what you eat.  


Click HERE for the recipe from the Food Network website.

Monday, October 25

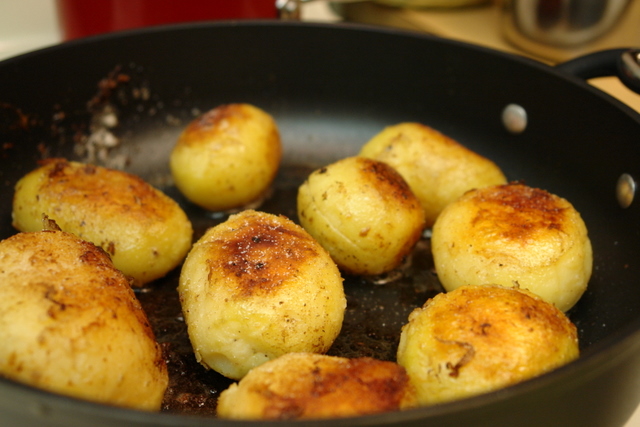
Update to Mac Monday: Fried Mashed Potato Balls

It's Chef Nick!!!!!!!!!!!!!!

Hooray for Mac Monday: Fried Mashed Potato Balls!!! ...Is It Thanksgiving Yet?!?!


     I went to sleep away camp for the first time in the summer of 1998 when I was in 2nd grade.  Camp O-AT-KA is a traditional all-boys camp, founded in 1906 on the shores of Lake Sebago in Maine.  I wish I could be a camper forever so for the past 5 summers I have worked at the same camp; now I'm a counselor and trying to still feel like a camper even though I'm almost 21 and in college.  

     The camp food is always the best on the opening Sunday of each summer session (because we are trying to impress the parents who are dropping their kids off at camp).  For the past 2 summers, the head chef, Nicolas Munua, has made the most amazing side dish: FRIED MASHED POTATO BALLS!!!  I know it sounds crazy, but they were the most amazing, delicious thing I ate all summer (granted it is camp food.  I started to pester Nick to find out just how he made them.


     He FINALLY told me the recipe at the end of this past summer.  As soon as he started telling me the ingredients and method, I started thinking about all the excuses I could come up with to make this recipe again.  Suddenly, I realized that this new spin on mashed potatoes would be perfect for an updated Thanksgiving Dinner.  


     There are just about 4-weeks until the best holiday of the year: THANKSGIVING!  So in these few excruciatingly long weeks before I get to spend Thanksgiving break with my family in New York, I thought it was only appropriate to whet your appetite and share the recipe.  You better start practicing this recipe before the family arrives for Thanksgiving!!!

The Camp O-AT-KA Shield


Ingredients:
2 cups of mashed potatoes
1/2 cup of plain bread crumbs
1/2 cup chopped scallions
1 egg (lightly beaten)
olive oil

Preparation:
     After making your mashed potatoes put them into the freezer for about 1 or 2 hours, until they firm up.  This helps to keep the potatoes together in the frying process.
     Once the potatoes are cooled, remove them from the freezer and let them warm up for about 30 minutes.
     In a large mixing bowl, mix together the potatoes, scallions and egg. 
     Then start rolling the mashed potatoes into little balls.  
     Now spread the bread crumbs out onto a plate or a cookie sheet (preferably with a lip so the bread crumbs do not spill over the edge).  Roll the mashed potato balls in the bread crumbs until there is an even coating. 
     In a medium skillet over medium heat, add about an inch of oil.  (If you have a frying thermometer you are looking for a temperature of about 375 degrees.)  Once the oil is hot, start to fry the balls in batches.  
Each batch should take about 2-3 minutes.  You will know when each batch is done when the breadcrumb coating has a nice golden brown color to it. 

I hope you enjoy this recipe.  It is simple and easy way to bring something new to your thanksgiving tradition.  Remember cook what you love, love what you eat!

Monday, October 18

Hooray for Mac Monday: the ULTIMATE Fish & Chips

Note from Mac:
I have to admit that I cheated a little for this week’s Mac Monday.  This is not my own recipe and I have never cooked fish and chips according to this recipe.  However, I was watching Tyler Florence’s “Tyler’s Ultimate” and saw this recipe and had to pass it on to you guys.  It looked so good that I seriously considered going out to buy a deep fryer and frying thermometer just to make this recipe exactly as Tyler did.  
Ingredients:
  • Vegetable oil (for deep frying)
  • 3 large russet potatoes
  • 2 cups rice flour
  • 1 tbsp baking powder
  • 3 tsp salt, plus more for seasoning
  • 1/2 tsp freshly ground black pepper, plus more for seasoning
  • 1 (12-oz) can soda water
  • 1 large egg, lightly beaten
  • Two 8-oz cod (or haddock) fillets, cut in half on an angle
  • 1/2 cup rice flour (for dredging)
  • Malt vinegar (for serving)

Directions:
Heat 3 inches of the oil in a deep fryer to 325 degrees (or use a deep heavy skillet).
Peel the potatoes and cut them into chips (aka fries in America) about the size of your index finger. 
Put the potatoes in a fryer basket and lower into the oil.
Fry the chips for 2 to 3 minutes (they should not be crisp or fully cooked at this point); remove the chips to a paper towel-lined platter to drain.
Crank the oil temperature up to 375 degrees. 
In a large mixing bowl, combine the flour, baking powder, salt & pepper. 
Combine soda water and egg; pour into the flour mixture. 
Whisk to a smooth batter. 
Spread the rice flour on a plate. 
Dredge the fish pieces in the rice flour and then dip them into the batter, letting the excess drip off.
Put the chips in the bottom of the fryer basket and carefully submerge in the hot oil. 
Lower the battered fish into the bubbling oil on top of the chips. 
Fry the fish and chips for 4 to 5 minutes until crispy and brown. 
Remove the basket and drain the fish and chips on paper towels; season lightly with salt. Serve wrapped in a newspaper cone with malt vinegar and/or tartar sauce.

For more tips on Fish and Chips, check out The Food Network website.

Mac’s Take on the Recipe:
          I have never cooked fish and chips the way Tyler describes here, but I have tried other methods that are along the same lines.  Tyler uses a list of pretty high quality ingredients here.   If you want to switch it up (and make it a little more affordable),  you can use any white fish, not just cod or haddock.  I have used flounder as well as tilapia in the past.  Each fish has its own distinct flavor and texture, so keep in mind that you are going to have a different taste than the traditional fish and chips.  You can always try using a good stout beer instead of the soda water for the batter.  I've seen a few too many episodes of Iron Chef, and the battles seem to indicate that Guinness is the best choice stout beers.   
Ina Garten's Baked Potato Wedges

          
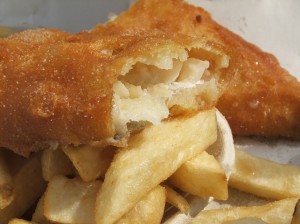
Baked Fish & Chips
The most important MacSpin on this recipe is that you don’t necessarily need a deep fryer.  You can always just pan fry the fish (be sure to have a splatter screen on hand if you do).  Just cook the fish in a regular skillet as you would for any other dish.  This won’t get you the ideal "fish & chips" results and will take a little bit longer, but it's pretty darn close and a lot easier than buying a deep fryer.  Concerning the chips/fries, you can always bake the potato wedges for a similar result.  Ina Garten, the chef behind the Barefoot Contessa, has a great recipe.  It's midterms week here at Maryland, so I haven’t had too much time to cook, let alone post about it.  I’ll do my best to come up with something extra awesome for next week.  


Remember cook what you love, love what you eat. 

Monday, October 11

Hooray for Mac Monday: Shepherd's Pie

Here's a note directly from Mac... 

Hi Everyone.  Sorry for the late post but I wanted to make this recipe before I posted it to make sure it was as good as I hoped.  This recipe is based off of a traditional Irish meal, Shepherd’s pie.  Unfortunately for me, I didn’t have the ingredients or the proper kitchen equipment to make this dish in the classic style, so I improvised.  For this recipe I will put the ingredients I used followed by the ideal ingredients in parenthesis.  By no means is this the ideal shepherd’s pie, but it is easy and tastes great.  This is not the healthiest meal but it is an amazing comfort food that will leave you more than satisfied.  
SHEPHERD'S PIE
Straight from Mac's college kitchen to your computer
Ingredients:
2 ¼ pound hamburger patties; defrosted and cut up into small chunks* 
4 servings of instant mashed potatoes** 
1/3 a cup of chopped carrots
1/3 a cup of chopped celery
1/3 a cup of chopped onions
5 cloves of garlic
2 sprigs of scallions, chopped
¼ cup of chicken broth
Butter, cut into small cubes (about ¼ of an inch)
Salt
Pepper
Olive Oil


*You can use hamburger patties or buy 1/2 lb ground beef, whichever is easier.
**If you have the time, fresh mashed potatoes are the best.  If you are going to use real mashed potatoes, use 4 cups of real mash potatoes.  Here's a great recipe for mashed potatoes.


Preparation:
Preheat the oven to 400 degrees.  
Start cooking the mashed potatoes as directed.  
Then in a medium cast iron skillet (or another pan that can safely go into the oven) over medium-low heat add enough olive oil to cover ¾ of the pan.  
Add in the garlic and onions and let them cook until the onions become translucent and soft.  
Then add the hamburger chunks (or ground beef).  
As the meat begins to release its fat and begins to brown add the celery and carrots to the pan and continue to stir occasionally.  
Once the meat is completely browned on the outside add in the chicken broth and the scallions.  
Then cover the pan and let the vegetables steam themselves for 4-5 minutes or until they start to become tender.  If the chicken broth hasn’t boiled off don’t worry about it.  It will cook off in the oven.  
Add salt and pepper to taste.  

Now comes the fun part:
Take the mashed potatoes you prepared earlier and spread them over the top of the meat and vegetable mixture.  
Then take the small cubes of butter and place them around on top of the mashed potatoes.  
This will help to give the potatoes a nice golden brown look.  
Now take the cast iron skillet and place it directly into the oven.  
Let the pie cook for about 5-7 minutes or until the potato crust begins to firm up and turns a slight golden brown.  
Now serve and enjoy.  

Remember cook what you love, love what you eat.